How to Perform Air Compressor Maintenance?
An air compressor often gives small warnings before a major breakdown: a new rattle, a rising discharge temperature, or moisture collecting near the drain. Regular air compressor maintenance helps catch these changes early, protect air quality, and reduce avoidable downtime. The work is practical, not mysterious. It includes checking filters, belts, oil levels, drains, hoses, and electrical connections according to the manufacturer’s instructions. A clean intake filter and a properly drained receiver can make a visible difference. So can a simple logbook.
Compressed-air specialist Ron Marshall’s technical guidance can be expressed as a useful maintenance principle: “Notice small changes before they become costly failures.” This is a summary, not a verified verbatim quotation. It reflects the value of monitoring leaks, pressure, and system performance over time. Still, a checklist cannot predict every failure. That matters. A compressor may sound normal while a clogged cooler quietly pushes temperatures upward. Operators should record readings, compare them with equipment specifications, and seek qualified service when results look unusual. Never bypass guards or safety devices to speed up an inspection.
This guide explains how to build a routine around daily observations, scheduled servicing, and clear records. It also covers common warning signs and when to call a technician. The right schedule depends on compressor type, workload, environment, and manufacturer guidance. Dusty rooms, frequent cycling, and high humidity can change the maintenance needs. Small habits help. A few minutes of inspection may prevent hours of interruption, though maintenance alone cannot guarantee trouble-free operation.
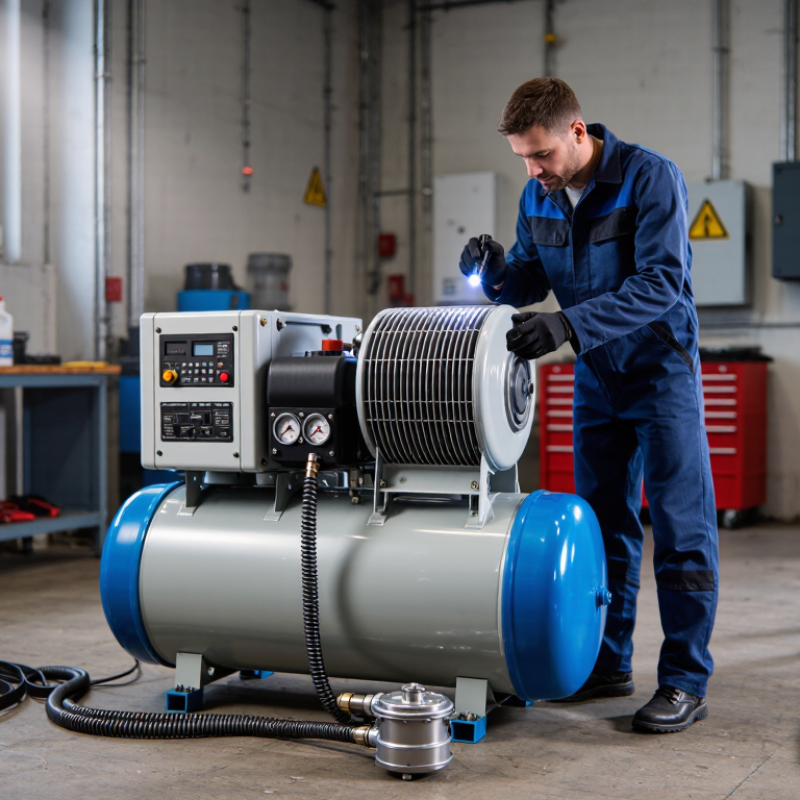
Prepare the Compressor and Follow Safety Precautions
How to Perform Air Compressor Maintenance?
Prepare the Compressor and Follow Safety Precautions
Before maintenance, place the compressor on a stable, dry surface with enough room to reach its controls. Switch it off, disconnect its power source, and let the motor cool. Relieve pressure according to the manufacturer’s instructions, then verify the gauge reads zero before opening any service points. A quiet workshop can make residual air seem harmless. It is not. Never loosen a fitting or remove a cover while the system is pressurized. Wear safety glasses, and keep loose clothing and hair away from moving parts.
Tips: Keep the manual nearby. Use the correct tools, and set them within reach before starting. Take a quick photo of hose and wire positions if a part must be removed; it can prevent a confusing reassembly. Don’t rely on memory alone.
Check that the work area is well lit, and keep children and bystanders clear. If the compressor is hard-wired, or the task involves internal electrical components, stop and contact a qualified technician. Do not bypass guards or safety switches to save time. It is easy to overlook one small connection when the bench is crowded, so pause and compare each step with the service instructions before restoring power.
Inspect the Compressor and Identify Maintenance Needs
Begin with a visual check while the compressor is switched off and cool. Isolate its power and release stored pressure as directed in the manual before removing guards or opening drain points. Look for oil stains, rust, loose fasteners, damaged hoses, and cracked electrical insulation. Small clues matter. Check that the intake area is clear and the filter is not clogged with dust. On belt-driven units, inspect the belt for fraying or unusual slack without touching it. Never loosen a fitting to test for pressure.
Identify needs from what you find, not from a generic checklist alone. A rising temperature or a pressure gauge that behaves erratically may point to restricted airflow, leakage, or another fault. During a brief operating check, listen from a safe distance for hissing, knocking, or new vibration; use an approved leak-detection method if needed. Do not guess. Drain moisture only as specified, since tank designs and procedures vary. Check oil levels only on lubricated models, and follow the stated service interval. Record readings, visible wear, and unusual sounds with the date. I might miss a faint hiss on a noisy shop floor, so a second listen can be worthwhile. If wiring, pressure controls, or tank corrosion look questionable, stop using the unit and ask a qualified technician to assess it.
Drain Moisture and Service Filters, Oil, and Belts
Moisture collects inside an air receiver as warm air cools. Drain it regularly, especially in humid conditions or after long runs. Shut the compressor off, let it cool, and follow the manual’s pressure and isolation steps before opening the drain. Wear eye protection and direct any discharge away from people. Open the valve slowly; water may come out with force. Close it securely, then check for leaks. It is a small task, but an easy one to postpone.
Inspect intake and line filters for dust, oil, or damaged media. Replace or clean them only as the service instructions allow; a clogged filter can reduce airflow and increase strain. Check the oil level on a level surface, using the specified oil type and fill range. Never overfill. If the oil looks milky, unusually dark, or contains particles, investigate before continued use. Keep a simple service log. I sometimes find that a date alone is not enough; note operating hours and what you observed.
Before checking belts, disconnect power and prevent an unexpected restart. Examine each belt for cracks, fraying, glazing, or uneven wear. Check tension using the maker’s method rather than guessing by feel. A belt that is too tight can load bearings; one that slips may squeal or leave black dust nearby. Replace damaged belts as a matched set when specified, and reinstall guards before operation. After servicing, listen for new vibration or noise during a brief, supervised run.
Check Electrical Connections and Safety Controls
Before servicing an air compressor, disconnect and lock out its power supply. Verify zero energy with an appropriately rated tester; never rely on a switched-off control panel. Inspect wiring, terminals, grounding, and cable glands for looseness, cracked insulation, corrosion, or heat discoloration. A faint burnt-plastic smell matters. Stop and call a qualified electrician if you find damage or are unsure. ESFI’s analysis of U.S. Bureau of Labor Statistics data recorded 126 workplace deaths from electrical exposure in 2022. That figure covers many industries, not compressors alone, but it underlines why a quick glance is not enough.
Test safety controls according to the equipment manual and your site’s maintenance procedure. Check that the pressure switch stops the motor at its specified setting, the overload protection trips as intended, and the emergency stop actually interrupts operation. Record test dates and any replacement parts; handwritten notes can be imperfect, so verify them against the work order. The U.S. Department of Energy’s compressed-air sourcebook reports that leaks can waste 20% to 30% of compressor output. Air leaks are not electrical faults, but tracking them separately helps teams avoid mistaking poor system performance for a control failure. Never bypass a safety device to keep production running.
Air Compressor Maintenance: Electrical Connections and Safety Controls
Checklist items shown by inspection category. Follow the compressor manufacturer’s instructions; isolate and de-energize equipment before inspection, and have electrical work performed by a qualified person.
Electrical connection checks: inspect wiring, terminals, grounding, and signs of heat or damage. Safety control checks: verify the pressure switch, pressure relief valve, emergency stop, and guards are present and undamaged. Never bypass a safety device.
Restart the Compressor and Record Maintenance Results
After maintenance, check that every access panel and guard is secured. Remove tools, rags, and loose fasteners from the compressor area. Close drain valves and reconnect power only as directed by the equipment instructions. Keep clear of belts, hot surfaces, and moving parts. Pause here. A rushed restart can hide a missed step.
Start the compressor using its normal procedure, preferably with the system unloaded if the instructions allow it. Watch the pressure gauge as it rises. Listen for new rattling, harsh knocking, or unusual cycling, and check for air or oil leaks from a safe distance. Stop the unit if you notice abnormal noise, excessive vibration, or a warning indicator. Do not reach inside to investigate while it is running. I have learned that a quiet first minute is useful, but it does not prove everything is right; keep observing through a normal operating cycle.
Record the date, operating hours, work performed, and any parts or fluids replaced. Note readings such as starting pressure, cut-out pressure, and any temperature value required by the service procedure. Include what you observed after restart, even if nothing seemed unusual. A log entry like “checked” is too vague to help later. Write down the actual measurement, or mark it unavailable and explain why. Add the technician’s name and any follow-up action, such as rechecking a connection after the next shift. Small details matter.
How to Perform Air Compressor Maintenance? - Restart the Compressor and Record Maintenance Results
| Date |
Compressor ID |
Maintenance Performed |
Pre-Start Checks |
Restart Procedure |
Operating Pressure |
Discharge Temperature |
Leak, Noise, and Vibration Check |
Result |
Technician Initials |
| 2026-10-12 |
AC-01 |
Cleaned intake filter; checked oil level and drain operation |
Guards secured; fittings tight; oil within sight-glass range |
Restored power, opened the discharge valve gradually, and monitored the first operating cycle |
7.0 bar (102 psi) |
78°C (172°F) |
No visible leaks; normal sound and vibration |
Passed |
MK |
| 2026-10-19 |
AC-02 |
Replaced intake filter; inspected belt tension and condensate drain |
Electrical connections secure; belt aligned; drain clear |
Started unloaded, confirmed stable operation, then returned the compressor to service |
7.2 bar (104 psi) |
81°C (178°F) |
No leaks detected; no unusual noise or vibration |
Passed |
JR |
| 2026-10-26 |
AC-03 |
Drained receiver; checked oil condition and hose connections |
Receiver drain closed; safety guards in place; connections secure |
Re-energized the unit and checked pressure build-up and automatic shutoff |
6.8 bar (99 psi) |
76°C (169°F) |
Minor leak found at a hose coupling; coupling tightened and rechecked |
Passed after correction |
LS |
| 2026-11-02 |
AC-04 |
Cleaned cooler fins; inspected electrical isolator and drain line |
Cooler unobstructed; isolator restored; drain line unobstructed |
Restarted under observation and checked for abnormal temperature rise |
7.1 bar (103 psi) |
84°C (183°F) |
No leaks; slight vibration noted and referred for follow-up inspection |
Operating; follow-up required |
TC |