7 Air Compressor Gauge Tips for Global Buyers

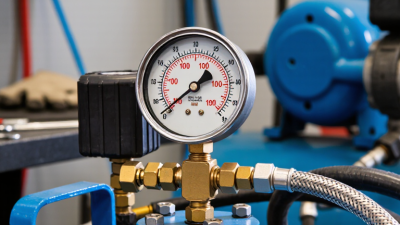
Buying a pressure instrument across borders is rarely just a price comparison. An air compressor gauge must match the compressor, working pressure, connection, environment, and operator’s habits. A small dial can affect maintenance decisions, production continuity, and equipment safety. Small dial, serious consequences.

This introduction explores seven practical tips for global buyers. It considers pressure range, measurement units, accuracy, calibration records, thread standards, sealing materials, and environmental protection. It also explains why supplier documentation deserves careful attention. A clear datasheet should identify the gauge’s display, connection size, operating temperature, and rated pressure. Missing details create avoidable questions after delivery.

Real purchasing work is often less tidy than a checklist. I have seen buyers choose a lower-cost model, then discover incompatible threads or confusing bar and psi markings. That assumption can be expensive. Another buyer may request high accuracy without confirming whether the compressor system needs it. More accuracy is not always better value.

Reliable sourcing requires more than reading product photographs. Buyers should compare test certificates, calibration methods, quality controls, and after-sales support. They should also ask how the air compressor gauge performs under vibration, moisture, oil exposure, and repeated pressure changes. A careful supplier will answer clearly, not hide behind general claims. These tips are designed to support practical evaluation, reduce specification mistakes, and encourage better questions before an international order is placed.

7 Air Compressor Gauge Tips for Global Buyers

Define Pressure Units: 1 bar Equals 14.5038 psi and 100 kPa

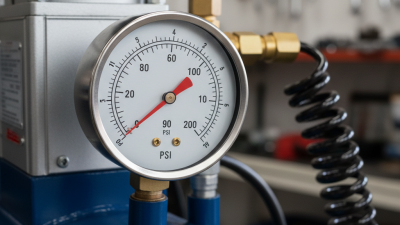
When buying an air compressor gauge internationally, pressure units can create expensive misunderstandings. One bar equals 14.5038 psi and exactly 100 kPa. This relationship helps buyers compare specifications without guessing. A gauge marked 7 bar indicates about 101.5266 psi or 700 kPa. Many workshops round this to 102 psi. That is practical, but not perfectly precise. Keep the original unit visible during purchasing.

Check whether the instrument measures gauge pressure or absolute pressure. Gauge pressure uses local atmospheric pressure as zero. Absolute pressure includes atmospheric pressure, so 1 bar absolute is not the same as 1 bar gauge. Ask for the reference clearly. Confirm the scale range, connection size, dial diameter, accuracy class, and operating temperature. A 0–10 bar gauge may be unsuitable for a system running near 9 bar. The needle can sit too close to its limit.

Before installation, compare the compressor setting, hose rating, and gauge reading in one unit. Use 100 kPa steps when the manual uses kilopascals. Use 14.5038 when a technical calculation requires psi. Inspect the needle at zero after releasing pressure. A small offset deserves attention. Rushed conversions can cause avoidable adjustments, especially when rounded values move between shipping documents and workshop labels. Record the chosen unit on the purchase order and calibration record. Recheck it after vibration, moisture, or impact.

Select Gauge Range: Keep Normal Pressure Within the Middle Third

7 Air Compressor Gauge Tips for Global Buyers

Select Gauge Range: Keep Normal Pressure Within the Middle Third

Gauge range selection affects reading accuracy, fault detection, and maintenance decisions. For a system normally operating at 90 psi, a 0–150 psi gauge places pressure near the center. A 0–300 psi gauge makes the same pressure look compressed and difficult to read.

ASME B40.100 recommends keeping steady pressure below about 75% of full scale. Fluctuating pressure needs a lower working position, often near 65% or less. The middle third is a practical target, not an absolute rule. It gives the pointer room to show pressure rises, drops, and pulsation. Leave some margin.

The U.S. Department of Energy reports that compressed-air leaks can waste 20–30% of compressor output. A poorly selected gauge may hide these losses during quick inspections. Choose a range that shows small pressure changes clearly, especially near filters, receivers, and point-of-use regulators. For a normal 6 bar system, a 0–10 bar gauge can provide useful visibility. A 0–16 bar model may offer more protection, but less resolution.

Field experience adds one warning. “Normal” pressure is not always stable. Demand changes, long piping, and clogged elements can shift the reading. Check the gauge during startup and peak production. Review the choice against the DOE Compressed Air Sourcebook and ASME B40.100 requirements. The first range selected may still prove too wide.

Verify Accuracy Classes Under ASME B40.100 and EN 837: 1.0–2.5

When buying an air compressor gauge globally, verify the accuracy class before comparing prices. EN 837 commonly lists Class 1.0, 1.6, or 2.5. The number represents the maximum error as a percentage of the scale span. A Class 1.0 gauge may allow ±1% of full scale.

ASME B40.100 uses a different classification system. Its grades and test methods should not be treated as direct equivalents to EN 837 classes. Ask for the stated accuracy grade, reference standard, and calibration conditions. Do not accept “high accuracy” without documented limits. Tip: Compare technical definitions, not marketing terms. A gauge marked 0–10 bar with Class 1.0 may vary by ±0.1 bar across its span.

Selection details affect real performance. Choose a range where normal pressure sits near the middle third of the dial. Avoid using a 0–40 bar gauge for a 6 bar system. Small readings become difficult to judge. Tip: Request a calibration certificate with test points, temperature, and traceability information. Check whether the certificate covers the complete operating range.

Installation can expose weaknesses. Vibration, pulsation, heat, and pressure spikes may reduce accuracy over time. A snubber or suitable pressure isolator can help, but it must match the application. I have seen gauges pass a bench test and drift after harsh compressor service. That result deserves review, not excuses. Tip: Recheck calibration after commissioning and during planned maintenance.

Lower percentages indicate tighter allowable indication error. EN 837 classes 1.0, 1.6, and 2.5 are shown alongside common ASME B40.100 dial-gauge grades A, B, and C. These categories should be verified against the specific gauge design and are not direct standard-to-standard equivalencies.

Compare Dial Sizes, G1/4 Ports, and Connection Materials for 8–10 bar Systems

7 Air Compressor Gauge Tips for Global Buyers

For 8–10 bar systems, select a gauge with a 0–16 bar scale. This keeps normal readings near the middle. ASME B40.100 recommends avoiding routine operation near full scale. Tip 1: Choose a 63 mm dial for clear cabinet viewing. Tip 2: Use a 100 mm dial when operators read pressure from several meters away. Tip 3: Check accuracy class 1.6 or better. Smaller dials can be difficult to read. They are not always cheaper in practice.

Confirm the G1/4 port carefully. G1/4 usually indicates a parallel thread under ISO 228-1, but sealing methods can differ. Tip 4: Match the port thread and sealing washer before ordering. Tip 5: Select a bottom connection for wall panels, or a back connection for instrument boards. Tip 6: Prefer brass for ordinary dry air and stainless steel for humid, oily, or corrosive surroundings. Condensation is easy to underestimate. It quietly damages connections.

Pressure pulsation also affects readings and service life. Tip 7: Add a restrictor or snubber when the needle vibrates continuously. The U.S. Department of Energy’s compressed-air guidance estimates leakage can waste 20–30% of compressor output, so accurate gauges support practical leak checks. EN 837-1 also stresses suitable pressure ranges, accuracy, and safety design. One detail deserves reflection: a larger dial improves visibility, but it may need more panel space and stronger support. Always verify media temperature, vibration, and installation orientation before purchasing.

7 Air Compressor Gauge Tips for Global Buyers - Compare Dial Sizes, G1/4 Ports, and Connection Materials for 8–10 bar Systems

Tip Selection Dimension Typical Data for 8–10 bar Systems Practical Recommendation Buyer Verification Point
1 Choose the correct pressure range 8 bar ≈ 116 psi; 10 bar ≈ 145 psi. Common full-scale ranges include 0–16 bar or 0–232 psi. For a normal operating range of 8–10 bar, select a 0–16 bar gauge so readings remain in the middle portion of the scale. Confirm the gauge's maximum allowable pressure, overpressure resistance, and whether the scale is bar, psi, or dual-unit.
2 Compare dial diameter and readability 40 mm and 50 mm: compact; 63 mm: general-purpose; 80–100 mm: easier to read from a distance. Use 63 mm for standard panels and machinery. Choose 80 mm or larger when the operator reads the gauge from approximately 1 m or more away. Check the actual case diameter, mounting depth, pointer visibility, graduation spacing, and available installation space.
3 Verify the G1/4 connection G1/4 is a common nominal 1/4-inch BSPP parallel thread used in many pneumatic assemblies; the thread has 19 threads per inch. Select G1/4 only when the mating port is also G1/4 BSPP. A parallel thread normally requires a sealing washer, bonded seal, or suitable gasket. Do not substitute NPT or another thread standard without a compatible adapter. Confirm thread designation, sealing method, and port orientation.
4 Match connection material to the air circuit Nickel-plated or plain brass is commonly used for clean, dry compressed air. Stainless steel is preferred for moisture, washdown, or mildly corrosive environments. Choose brass for general indoor compressor systems and stainless steel when corrosion resistance or frequent cleaning is required. Check whether the wetted parts are compatible with condensate, lubricants, cleaning chemicals, and the specified operating temperature.
5 Select the accuracy class Common analog pressure-gauge accuracy classes include 1.0, 1.6, and 2.5, representing percentage of full-scale span under specified test conditions. Class 1.6 is suitable for many industrial pneumatic applications; Class 1.0 is better for tighter monitoring requirements. For a 0–16 bar gauge, Class 1.6 corresponds to up to approximately ±0.256 bar under the relevant reference conditions.
6 Consider vibration and pulsation Compressor outlets can generate pointer fluctuation and mechanical wear, especially near reciprocating pumps or rapidly cycling valves. Use a movement designed for pulsating service, a restrictor, or a compatible glycerin-filled case when vibration and pressure pulsation are significant. Confirm the filling liquid, operating-temperature range, pulsation limits, and whether the gauge requires a snubber or isolation valve.
7 Check mounting and international documentation Common configurations include bottom entry, back entry, center-back entry, and panel-mount versions with a flange or clamp. Select the mounting style that keeps the dial visible and prevents the tube or fitting from carrying installation stress. Request dimensional drawings, calibration information, applicable EN 837-1 or equivalent conformity details, packaging specifications, and thread documentation.
Quick selection example: For a clean indoor compressed-air line operating at 8–10 bar, a 63 mm analog gauge with a 0–16 bar range, Class 1.6 accuracy, G1/4 BSPP connection, and brass or nickel-plated brass wetted parts is a common starting configuration. Verify the actual pressure, temperature, vibration, thread, and material requirements before purchase.

Confirm Calibration, Temperature Limits, and Safety Ratings for Global Markets

7 Air Compressor Gauge Tips for Global Buyers

Confirm Calibration, Temperature Limits, and Safety Ratings for Global Markets

Air compressor gauges look simple, yet global installations expose weak assumptions. Readings can drift after vibration, heat, or rough transport.

Tip 1: Confirm calibration before shipping and after installation. Compare the gauge with a traceable reference at several pressure points. Do not check only normal operating pressure.

Tip 2: Record the calibration date, tolerance, and test conditions. Keep these details with the equipment file.

Tip 3: Check temperature limits carefully. A gauge rated for a cool workshop may struggle near a hot compressor head. Measure ambient and process temperatures separately.

Tip 4: Consider altitude and sudden temperature changes during export. Condensation inside the case can cloud the dial or affect movement. This detail is easy to miss. I have seen installation plans ignore it, then blame calibration for unstable readings.

Tip 5 Match the pressure range to the system’s maximum pressure, not its average.

Tip 6 Verify safety ratings, materials, and pressure-relief features against local market requirements. Documentation matters when equipment crosses borders.

Tip 7: Inspect threads, seals, and connection sizes before installation. A correct reading is useless if the fitting leaks.

My checklist is not perfect, so I review it after every field issue.

Use qualified calibration services and retain inspection records. Small records protect large systems.